How to Use PHPMailer and send mail For Beginners?
In this blog, we will learn how to send mail to a WordPress website using PHP Mailer. First, we will search for PHP Mailer in our browser and by clicking on the first link in it we will download the 5.2 stable version of PHP Mailer by clicking on the master button on that page and extract the downloaded zip file to your XAMPP server in the htdocs folder.
So now we will copy four of these files, now we will see which of these four files are as follows.
- class.phpmailer.php
- class.phpmaileroauth.php
- class.smtp.php
- PHPMailerAutoload.php
we learn how to PHPMailer use and send mail so follow my few steps
Step1:- PhPMailer 5.2-stable version Download.
When the PHPmailer page opens, you will be reloaded by selecting the 5.2-stable version, clicking on the master button, then the code button on the left will appear, click on it and download the downloaded zip file.

Step2:- Select 4 Files And Copy your Project Folder.

Step4:- This code Copy and Paste your index.php file.
<?php
	if (isset($_POST['submit'])) {
		$name = $_POST['name'];
		$email = $_POST['email'];


	$html = "your name is $name <br/>
			your email is $email;";

	include('PHPMailerAutoload.php');
	$mail=new PHPMailer(true);
	$mail->isSMTP();
	$mail->Host="smtp.gmail.com";
	$mail->Port=587;
	$mail->SMTPSecure="tls";
	$mail->SMTPAuth=true;
	$mail->Username="example@gmail.com";//your currect gmail id//
	$mail->Password="examplepassword";//your currect gmail password//
	$mail->SetFrom("example@gmail.com");//add all msg send gmail id//
	$mail->addAddress('example2@gmail.com');//Send from location gmail add//
	$mail->IsHTML(true);
	$mail->Subject="New USER";
	$mail->Body=$html;
	$mail->SMTPOptions=array('ssl'=>array(
		'verify_peer'=>false,
		'verify_peer_name'=>false,
		'allow_self_signed'=>false
	));
	if($mail->send()){
		echo "done";
	}else{
		//echo "Error occur";
	}
	}
?>
<!DOCTYPE html>
<html>
<head>
	<title>mail send</title>
</head>
<body>

	<form method="post">
		Name : <input type="text" name="name" required>
		Email : <input type="email" name="email" required>
		<input type="submit" name="submit">
	</form>

</body>
</html>
Step5:- Now your PHPMailer is ready to try it.
Output:-

How to send mail in WordPress For Beginners Using PHPMailer?
First, Copy the Four Files you Created and paste them into a folder named New PHP Mailer and go to index.php, and include (‘phpmailer / phpMailerAutoload.php’); Leave this in place. Now open your WordPress dashboard and click on Jay Themes in Appearance and you will see the name of the active theme and now if you work offline fly open any project in your localhost xampp server which is in your htdocs folder, now your project folder is open In it click on wp-content and then on the themes and now open the folder where your theme was active and also paste the phpmailer folder and index.ph p file there.
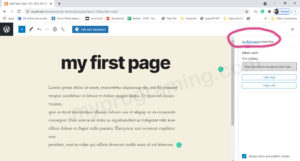
Now that you have done this, again you come to your WordPress dashboard and click on create a new page and give it a contact title. Then on the left side, you will see the page attributes. Then publish the page that shows the steps you will see on your website. Now I will tell you some important points and then explain how to do it in steps.
Step1:- Check out your Active Theme.

Step2:- Open your Project Folder code in your htdosc Folder. and open wp-content Folder then open themes folder and last select Active Theme folder open. (F:\xampp\htdocs\wordpressdemo\wp-content\themes\popularfx)

Step3:- Create phpmailer Folder and paste Four files here then also template-my.php create the file. template-my.php here file it is copy and paste.

Note:-
1. Add this name to the template-my.php template // Template name: mytmp.
2. include(‘phpmailer/PHPMailerAutoload.php’);
template-my.php
//Template Name:mytmp
<?php
session_start();
//Template Name:mytmp
get_header();
?>


<?php


	if (isset($_POST['submit'])) {
		$name = $_POST['fn'];
		$email = $_POST['email'];
        $mobile = $_POST['mobile'];


    $myname = $_SESSION['USER_NAME']=$name;

	$html = "name :- $name <br/>
			 email :- $email<br/>
             mobile :- $mobile<br/>
             ";


	include('phpmailer/PHPMailerAutoload.php');
	$mail=new PHPMailer(true);
	$mail->isSMTP();
	$mail->Host="smtp.gmail.com";
	$mail->Port=587;
	$mail->SMTPSecure="tls";
	$mail->SMTPAuth=true;
	$mail->Username="example@gmail.com";//your currect gmail id//
	$mail->Password="examplepassword";//your currect gmail password//
	$mail->SetFrom("example@gmail.com");//add all msg send gmail id//
	$mail->addAddress('example2@gmail.com');//Send from location gmail add//
	$mail->IsHTML(true);
	$mail->Subject="Hello $myname";
	$mail->Body=$html;
	$mail->SMTPOptions=array('ssl'=>array(
		'verify_peer'=>false,
		'verify_peer_name'=>false,
		'allow_self_signed'=>false
	));
	if($mail->send()){
		echo "<script>alert('done');</script>";
	}else{
		//echo "Error occur";
	}
	}
?>
<!DOCTYPE html>
<html>
<head>
	<title>MSG</title>
</head>
<style type="text/css">
	 .myprograming{
  text-align: center;
  background: #f3f3f3;
  width: 80%;
  padding: 50px;
  margin: auto;
 }
 .myprograming
form{
	background: lightgray;
	padding: 25px;
}

</style>
<body>
<div class="myprograming">
	 <h1>Get in Touch</h1>
	<form method="post">
		Name : <input type="text" name="fn" required><br/><br/>
		Email : <input type="email" name="email" required><br/><br/>
        Mobile : <input type="text" name="mobile" required><br/><br/>
		<input type="submit" name="submit">


	</form>
   </div>

</body>
</html>
Step4:- Create a new Page and Select New template ( mytmp ) and Publish.

Step5:- Open your Website and click on the Contact page then fill in the details then click submit button

Output:-


Wow so amazing sir…..